We've written a concise guide for those looking to learn the basics or just ensuring comprehension of their previous knowledge. To access specific details about any particular part, simply refer to the table of contents.

Menu
A book for every taste is
at your fingertips.
Don't miss the chance.
Life Changing
Informative Guides
Unbiased
Book Reviews
100%
Authentic Research
Straightforward
Buying Guides

How to Stencil Book Edges?
Do you want to get a straightforward guide on “how to stencil book edges?” Then, you’re at the right place. We’ll cover everything from choosing paint to drying.
Authentic Info Guaranteed
If you’re looking for a fun and unique way to infuse your personal flair into your book collection, stenciling the edges is the perfect creative endeavor to explore. By using stencils and acrylic paint, you can transform ordinary books into captivating pieces of art that reflect your individual style and interests.
In this blog, we will take you through a step-by-step guide on stenciling book edges, ensuring that each process is explained clearly and concisely. We’ll cover everything you need to know, from selecting the right stencil design and preparing the paint to securing the stencil and bringing your vision to life on the book edges.
So, let’s dive in and discover the joy of adding a personal touch to your bookshelf with mesmerizing stenciled designs.
Table of Contents
ToggleMaterials You'll Need:
Stencil(s) of your choice: You can purchase pre-made stencils or create your own using sturdy materials like cardboard or acetate.
Acrylic paint: Choose the colors you like, but make sure they contrast well with the book cover.
Paintbrushes: You’ll need small, fine-tipped brushes for precision.
Painter’s tape or masking tape: This will help keep the stencil in place and protect the book’s cover.
Paper towels or old cloth: For cleaning brushes and spills.
Scrap paper or cardboard: To create a barrier between the pages you’re working on and the rest of the book.
A flat surface: A table or a large cutting mat works well.
How to Stencil Book Edges: Step-By-Step Procedure
Author's Note
/* Targeting the element containing the sentences */
.content {
line-height: 1.2; /* Adjust this value as needed (e.g., 1.0, 1.1, 1.3, etc.) */
}
Quick Guide
|
1. Prepare the Work Area
Ensure your work area is set up with all the necessary materials, including stencils, acrylic paint, paintbrushes, painter’s tape, scrap paper or cardboard, and paper towels. |
|
2. Plan Your Design
Think about your interests, favorite themes, or elements that resonate with you. Whether it’s nature-inspired patterns, geometric shapes, quotes, or intricate designs, pick a stencil that reflects your personality and style. |
|
3. Secure the Stencil
Secure the stencil on the book edges, using painter’s tape to hold it firmly in place. |
|
4. Prepare the Paint
Squeeze out fresh paint onto the palette, choosing the colors you desire for your design. Dilute the paint if necessary for a specific effect. |
|
5. Stencil the Design
Repeat the stenciling process, using gentle tapping motions with your paintbrush to apply the paint to the book edges. Take your time and enjoy the creative process. |
|
6. Clean Up and Remove the Stencil
Once you’ve completed stenciling the design, carefully remove the painter’s tape and lift the stencil from the book edges. Clean up any smudges or mistakes as needed. |
|
7. Let It Dry
Allow the paint to dry completely before handling or displaying the stenciled book. Patience during the drying process ensures a clean and professional-looking result. |
|
8. Repeat With Other Books
If you have more books to stencil, continue the process with each one, creating a collection of personalized and visually striking works. |
|
9. Experiment and Have Fun
As you repeat the process on different books, feel free to experiment with various stencils, colors, and techniques. The possibilities are endless, and each book provides an opportunity for artistic expression. |
Detailed Method
Step 1: Prepare Your Work Area

Preparing your work area is essential for a successful and enjoyable stenciling experience. Creating a comfortable and organized space will allow you to focus on your creative process without any unnecessary distractions or messes. Here’s a step-by-step guide on how to prepare your work area for stenciling book edges:
→ Find a suitable workspace:
Look for a flat and well-lit surface to work on, like a table or a large cutting mat. Ensure that the area is well-ventilated to avoid inhaling fumes from the paint.
→ Gather your materials:
Before you begin, gather all the materials you’ll need for stenciling book edges. Double-check that you have your stencils, acrylic paint, paintbrushes, painter’s tape, paper towels or old cloth, scrap paper or cardboard, and any other items you might require.
→ Protect your work surface:
Lay down a protective barrier on your work surface to prevent any accidental spills or paint from seeping through the pages of the book. You can use scrap paper or cardboard to create this barrier.
→ Organize your stencils and paint:
Keep your stencils neatly arranged and easily accessible. If you have multiple stencils, you might want to sort them based on the order you plan to use them. Also, open your acrylic paint containers and have your paintbrushes ready to go.
→ Set up good lighting:
Proper lighting is crucial for precise stenciling. Make sure your workspace is well-lit so that you can clearly see the book edges and stencil details.
→ Wear suitable clothing:
Stenciling can sometimes get a little messy, so consider wearing old clothes or an apron to protect your outfit from any accidental paint splatters.
By taking the time to set up your work area properly, you’ll create a comfortable and organized environment that allows you to fully enjoy the stenciling process. Once your workspace is ready, you can move on to the exciting step of choosing your stencil design and securing it to the book edges!
Step 2: Choose Your Stencil Design
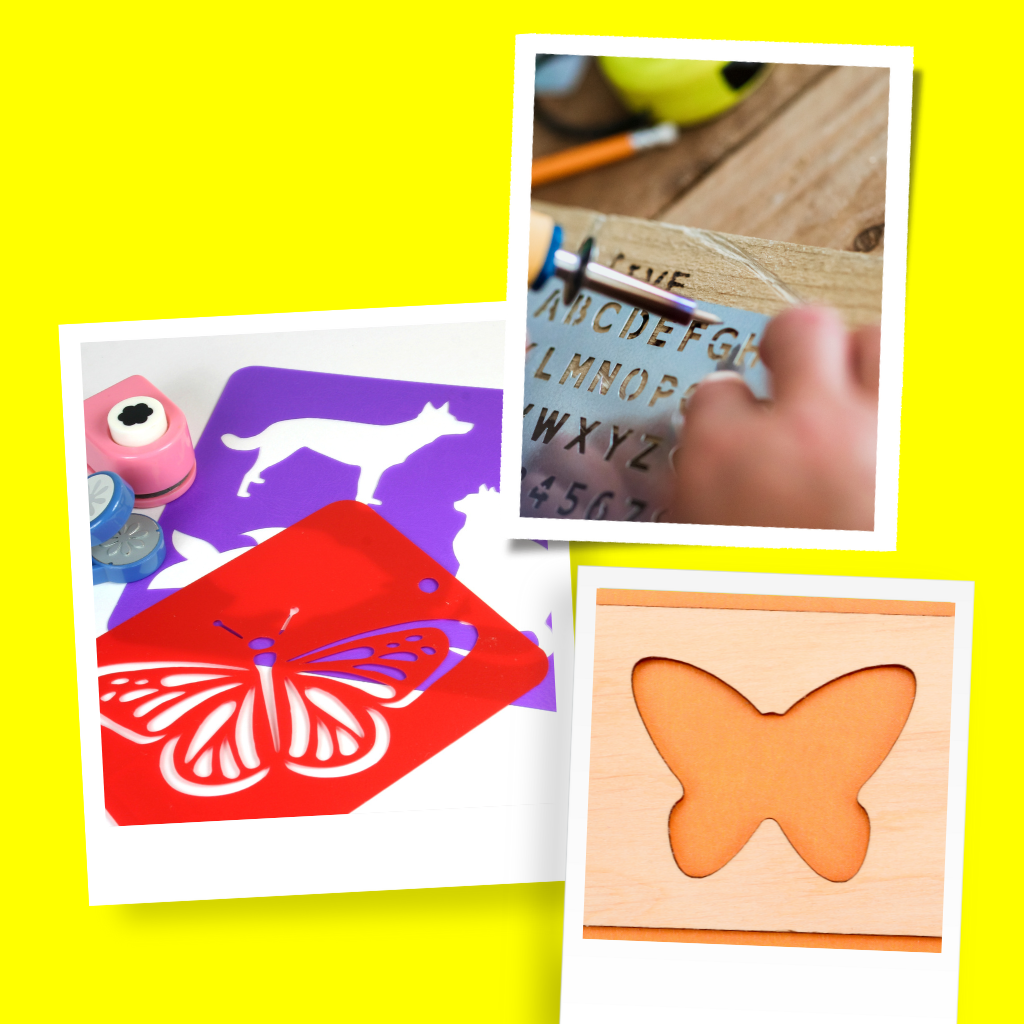
Choosing your stencil design is a delightful part of the stenciling process, as it allows you to express your creativity and personalize your books in a unique way. Here’s how you can select the perfect stencil design for your book edges:
→ Consider your preferences:
Think about your interests, favorite themes, or elements that resonate with you. Whether it’s nature-inspired patterns, geometric shapes, quotes, or intricate designs, pick a stencil that reflects your personality and style.
→ Size and scale:
Take the size of your books into account when choosing a stencil design. A design that fits well on one book might be too small or large for another. Test the stencil on a scrap piece of paper or cardboard to see how it aligns with the book edges.
→ Theme and coherence:
If you plan to stencil multiple books, consider creating a cohesive look by sticking to a particular theme or pattern. This will give your book collection a harmonious appearance when displayed together.
→ Pre-made or DIY:
Decide whether you want to use pre-made stencils available in craft stores or create your own. Making your own stencils can be fun and allows you to have a truly one-of-a-kind design.
→ Test the stencils:
If you’re unsure about a design, try testing it on a piece of paper first to see how it looks. This will give you a better idea of how the design will appear on the book edges and help you make any necessary adjustments.
→ Multiple stencils:
Feel free to use more than one stencil for a layered effect or combine different designs for a unique look. Just make sure they complement each other and the book’s cover.
→ Experiment with colors:
Don’t be afraid to get creative with colors. Consider using contrasting or complementary paint shades to make the design stand out.
→ Keep it simple:
If you’re new to stenciling, start with a relatively simple design. As you gain confidence and experience, you can explore more intricate patterns.
Once you’ve chosen the stencil design that excites you the most, you’re ready to move on to the next step—securing the stencil to the book edges for a clean and precise application.
Step 3: Secure the Stencil
Securing the stencil is a crucial step in the stenciling process to ensure that your design stays in place and prevents any accidental smudging or shifting while you work. Properly securing the stencil will help you achieve clean and precise edges on your books. Here’s how you can do it:
→ Positioning the stencil:
Carefully place the stencil on the book’s edge where you want the design to appear. Ensure that the stencil is aligned straight and centered, especially if you are using a symmetrical design. You can use a ruler or straight edge to help with alignment.
→ Painter’s tape or masking tape:
Once the stencil is in the desired position, use painter’s tape or masking tape to secure it firmly in place. The tape should go over the edges of the stencil and stick to both the book cover and the protective barrier (scrap paper or cardboard) underneath. This will prevent any accidental movement or slippage while you paint.
→ Smooth out the stencil:
Carefully smooth out any air bubbles or wrinkles that might have formed under the stencil. A flat, even surface will ensure that the paint is applied uniformly.
→Double-check the alignment:
Take a moment to double-check that the stencil is still aligned correctly and hasn’t shifted during the taping process. Small adjustments can be made at this stage if needed.
→ Extra tape for intricate designs:
If you’re working with a stencil that has delicate or intricate details, you might want to add extra strips of tape around those areas to keep them secure.
→ Masking parts of the stencil:
If your stencil has multiple elements, and you only want to use specific parts of it, you can use additional tape to mask off the areas you don’t want to paint. This technique allows for more versatility in your design.
→ Prepare for multiple books:
If you plan to stencil several books with the same design, repeat the above steps for each book. Having all the stencils taped and ready before you start painting will streamline the process.
Once your stencil is securely in place, you’re all set to move on to the exciting step of preparing the paint for stenciling! Taking the time to ensure the stencil’s stability will give you the confidence to create beautifully stenciled book edges that you’ll be proud of.
Step 4: Prepare the Paint

Preparing the paint for stenciling is a crucial step that determines the quality and appearance of your design on the book edges. Properly preparing the paint will ensure smooth application and vibrant colors. Here’s a step-by-step guide on how to prepare the paint for stenciling:
→ Choose the right acrylic paint:
Acrylic paint is an excellent choice for stenciling as it adheres well to various surfaces, dries quickly, and offers a wide range of colors. Select acrylic paint that contrasts well with the book cover to make your design pop.
→ Squeeze out the paint:
Before starting, squeeze a small amount of acrylic paint onto a palette or a clean surface. If you don’t have a palette, a disposable plate or even a piece of wax paper will work fine.
→ Dilute the paint (optional):
Depending on your preference, you can dilute the paint slightly with water to achieve a more transparent or watercolor-like effect. This step is entirely optional, but if you choose to do it, add water gradually and mix until you achieve the desired consistency.
→ Use separate brushes:
It’s a good idea to have dedicated brushes for each color you plan to use. Using separate brushes prevents color mixing and helps maintain the purity of each hue.
→ Test the paint on scrap paper:
Before applying the paint to the book edges, do a test run on a piece of scrap paper. This will help you get a feel for the paint’s consistency and ensure that it’s the color you want.
→ Load the brush:
Dip your fine-tipped paintbrush into the paint, ensuring that only the bristles are coated and not the entire brush. Wipe off any excess paint on the edge of the palette or on a paper towel.
→ Stencil pouncing technique:
For stenciling, use a gentle pouncing or tapping motion with the brush. Avoid brushing the paint back and forth, as this can cause the paint to bleed under the stencil and result in a messy design.
→ Start stenciling:
Carefully begin applying the paint to the exposed areas of the stencil on the book edges. Work slowly and steadily, filling in the design evenly.
→ Layering colors (optional):
If your design includes multiple colors, allow the first color to dry before adding the next. Use painter’s tape to mask off the areas you want to keep unpainted while applying the other colors.
By properly preparing the paint and using the appropriate techniques, you’ll achieve a clean and vibrant design on your book edges. Take your time and enjoy the creative process. Once you’ve finished stenciling, you can move on to the next step—creating the actual design on the book edges with the stencil!
Step 5: Stencil the Design
Stenciling the design is the exciting and creative part of the process, where you bring your chosen stencil design to life on the book edges. By following these steps, you can achieve a clean and beautifully stenciled design:
→ Position the stencil:
Ensure that the stencil is still securely taped to the book edges and aligned correctly. Check that it hasn’t shifted during the paint preparation process.
→ Begin stenciling:
With your paintbrush loaded with the desired color, gently pounce or tap the brush over the exposed areas of the stencil. Work from the outer edges of the stencil towards the center, being careful not to go beyond the stencil’s boundaries.
→ Apply light layers:
It’s better to apply multiple light layers of paint rather than a single heavy coat. This technique helps prevent paint from seeping under the stencil and ensures a crisp design. Allow each layer to dry before adding another.
→ Stencil with care:
Pay attention to the edges and fine details of the stencil design. Use a steady hand and take your time to maintain sharp lines and intricate elements.
→ Remove the stencil:
Once you’ve completed stenciling the entire design, carefully remove the stencil from the book edges. Gently peel off the painter’s tape, making sure not to smudge the paint in the process.
→ Check for touch-ups:
After removing the stencil, inspect the design for any imperfections or areas that may need touch-ups. You can use a small, fine-tipped brush to correct any mistakes or fill in any gaps.
→ Allow the paint to dry:
Set the book aside in a safe place to allow the paint to dry completely. Drying times may vary depending on the type of acrylic paint used, but it’s generally best to wait at least a few hours to be safe.
→ Repeat the process (if necessary):
If you plan to stencil multiple books with the same design, repeat the steps for each book. Remember to clean the stencil between uses to maintain the clarity of the design.
Stenciling book edges is a creative and rewarding way to personalize your books and give them a unique touch. By taking your time and following these steps, you’ll be able to achieve a beautifully stenciled design that showcases your artistic flair and adds character to your book collection.
Step 6: Be Patient

Being patient is a crucial step in the stenciling process that can make a significant difference in the final outcome of your book edges. Patience allows you to achieve clean and precise designs, avoid smudging or mistakes, and enjoy the creative journey. Here’s why being patient is essential and some tips to help you stay calm throughout the process:
→ Allow the paint to dry:
After stenciling the design, it’s essential to resist the temptation to touch or handle the book until the paint is completely dry. Acrylic paint usually dries relatively quickly, but depending on the thickness of the layers applied, it may take a few hours to fully set. Rushing this step may lead to accidental smudging and ruin your hard work.
→ Prevent paint smears:
Patience is especially crucial when stenciling intricate designs. Wait for each layer of paint to dry before adding another color or detail. Rushing this step can cause colors to mix, smudge, or bleed together, affecting the clarity of your design.
→ Correct mistakes carefully:
If you notice any imperfections or errors in your stenciled design, take a deep breath and address them calmly. Use a fine-tipped brush to make any necessary touch-ups, and don’t be discouraged if it’s not perfect right away. Stenciling can require some practice, and mistakes are a natural part of the learning process.
→ Avoid rush decisions:
If you’re stenciling multiple books with the same design, don’t rush through the process just to get it done quickly. Each book deserves the same attention and care. Take breaks if needed, and come back to the project with fresh eyes.
→ Clean your brushes properly:
Patience extends to the post-stenciling clean-up as well. Take your time to clean your paintbrushes thoroughly with water and mild soap to maintain their quality and longevity.
→ Appreciate the journey:
Stenciling book edges is a creative endeavor meant to be enjoyed. Embrace the process, experiment with colors and designs, and appreciate the uniqueness of each stenciled book.
Step 7: Clean Up and Remove the Stencil
Cleaning up and removing the stencil is a crucial step in the stenciling process that ensures your books look neat and professional. Properly removing the stencil will prevent any accidental smudging or paint transfer, leaving you with clean and precise designs on the book edges. Here’s a step-by-step guide on how to clean up and remove the stencil:
→ Check for any wet paint:
Before removing the stencil, double-check that there are no wet or tacky paint areas on the book edges. If you find any, wait a little longer for the paint to dry completely.
→ Clean your brushes:
While waiting for the paint to dry, clean your paintbrushes thoroughly. Make sure to remove all traces of paint from the bristles to maintain the quality of your brushes for future projects.
→ Remove the painter’s tape:
Gently peel off the painter’s tape or masking tape that was used to secure the stencil. Start from one edge and slowly pull it back, ensuring that it doesn’t touch the stenciled design. Removing the tape carefully will prevent any unwanted smudging or accidental paint removal.
→ Lift the stencil:
Once the tape is removed, carefully lift the stencil away from the book edges. Use a gentle and steady hand to avoid disrupting the design.
→ Inspect the design:
Take a moment to inspect the stenciled design on the book edges. Check for any areas that might need touch-ups or corrections. If you notice any imperfections, you can use a fine-tipped brush and matching paint color to fix them.
→ Clean any smudges or mistakes:
If there are any accidental paint smudges or mistakes on the book cover or pages, use a damp cloth or cotton swab to clean them up. Be careful not to rub too hard, as this might damage the book.
→ Allow the design to dry fully:
After cleaning up any smudges or mistakes, set the book aside to let the stenciled design dry completely. This final drying period ensures that the paint adheres well and won’t transfer onto other surfaces.
→ Store stencils properly:
If you plan to reuse the stencil for future projects, clean it thoroughly with water and mild soap. Allow it to dry completely before storing it in a safe and flat position to maintain its shape and integrity.
By following these steps, you’ll achieve professional-looking stenciled book edges that showcase your creativity and attention to detail. Cleaning up and removing the stencil with care is the last touch that completes your stenciling journey on a positive note. Now, you can proudly display or gift your beautifully stenciled books to enjoy the personal touch they bring to your collection!
Step 9: Let It Dry
After completing the stenciling process, one of the most crucial steps is to let the painted design dry thoroughly. Allowing sufficient drying time ensures that the paint sets properly, preventing any smudging or accidental damage to your beautifully stenciled book edges. Here’s why it’s important to let it dry and some tips to ensure a successful drying process:
→ Prevent smudging:
Allowing the paint to dry completely is essential to prevent smudging or transferring the design to other surfaces. Touching the painted area before it’s fully dry can ruin the crisp edges of the design and affect the overall appearance.
→ Maintain design integrity:
Proper drying ensures that the paint adheres well to the book edges, maintaining the clarity and vibrancy of the stenciled design. Rushing the drying process may lead to cracking or peeling of the paint.
→ Different paint drying times:
The drying time may vary depending on the type of acrylic paint used, the thickness of the paint layers, and environmental factors like temperature and humidity. Typically, acrylic paint dries within a few hours, but it’s best to be patient and give it ample time to set.
→ Lay the book flat:
To ensure the paint doesn’t smudge or run while drying, lay the stenciled book flat on a clean surface. Avoid stacking or placing heavy objects on top of the book during this time.
→ Avoid direct sunlight:
While drying, keep the book away from direct sunlight. Prolonged exposure to the sun can cause the paint to dry too quickly and may affect the final appearance of the design.
→ Test the dryness:
If you’re unsure whether the paint is completely dry, gently touch a small, inconspicuous area of the stenciled design. If it feels cool or tacky to the touch, it’s not fully dry yet.
→ Multiple layers:
If your design includes multiple colors or intricate details, make sure each layer of paint is thoroughly dry before adding the next. Patience between layers ensures clean lines and prevents color bleeding.
By giving your stenciled book edges ample time to dry, you’ll be rewarded with a beautiful, professional-looking design that you can proudly display or share with others. Embrace the waiting period as part of the creative process and let your patience be the final touch to your stenciling masterpiece.
Step 10: Repeat the Process
After successfully stenciling one book, you might find yourself eager to continue the creative journey and transform more of your books with unique designs. The step “Repeat the process” is all about extending the stenciling experience to additional books, exploring various designs, and enjoying the artistry of personalization.

Conclusion
In conclusion, stenciling book edges is a delightful and rewarding way to give your books a personal touch and turn them into unique pieces of art. Throughout this blog, we have explored how to stencil your book edges through the step-by-step process, from selecting the perfect stencil design to preparing the paint, securing the stencil, and letting it dry to perfection. By following these guidelines, you can achieve clean and professional-looking stenciled book edges that showcase your creativity and artistic expression.
Let your creativity soar, and enjoy the joy and satisfaction of creating unique and eye-catching designs that will captivate and inspire all who lay eyes on your stenciled book collection. Happy stenciling!
FAQs
To paint the edges of a book, secure the book closed with clamps or clips, then apply acrylic paint using a brush in smooth, even strokes. Allow the paint to dry before removing the clamps.
To spray book edges with a design, use a stencil to cover the rest of the book, then hold the book securely and spray the desired design using acrylic paint spray from a distance in light, even coats.
Acrylic paint is the best choice for painting book edges. It adheres well to paper and offers a wide range of colors, providing vibrant and long-lasting results.
Related Posts
